How to set up a POS system for a small shop
How to set up a POS system for a small business, in order: the computer, the install, products, a scanner and printer, then a test sale.
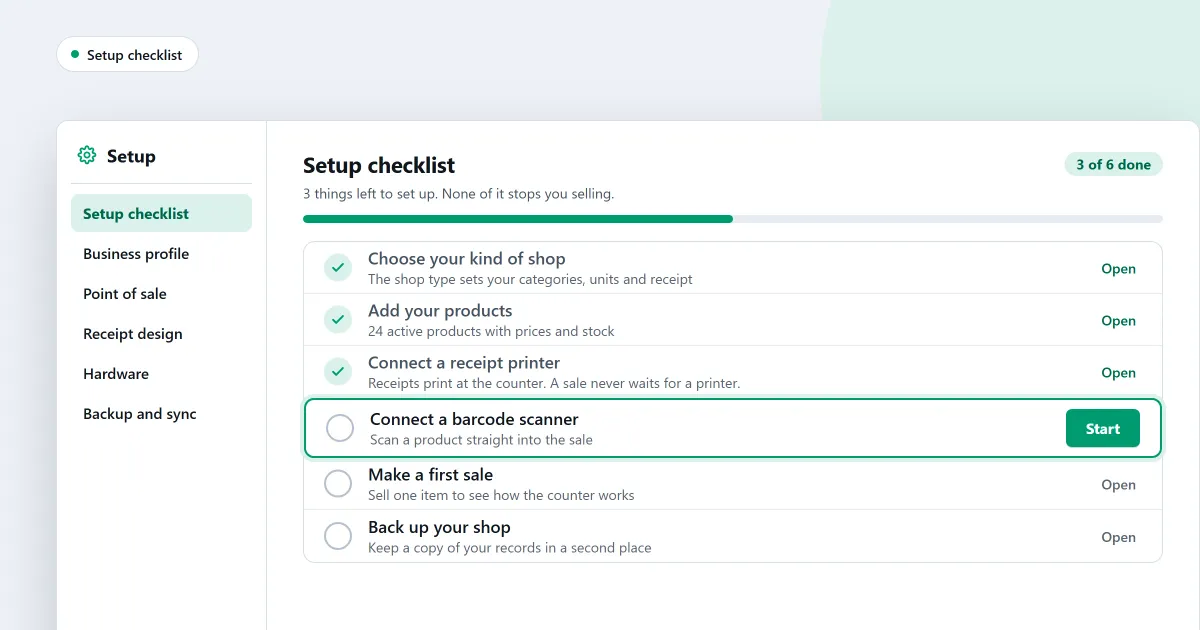
Are you looking for how to set up a POS system for a small business? Start with the order. The computer comes first, then the shop’s details, then the products, then the hardware, then one test sale. This page gives those steps in the order SellyPOS asks for them, and says which edition holds each part. New to the idea? Read what POS software is first.
1. Pick the computer for the counter
Choose the computer you will sell from, and keep it at the counter with the scanner and receipt printer plugged in. Keep the shop’s data on that computer’s own drive. SellyPOS will not open when the data sits in a network folder, a mapped drive or a cloud-sync folder.
SellyPOS is a Windows program. It runs on Windows 10 (version 1809 or later) and on Windows 11, both 64-bit. It is not a browser app. The system requirements are on the download page.
2. Install and sign in
Download the edition you want and run its installer. The install guide shows each screen. When SellyPOS asks, sign in with Google as the shop’s owner. Setup then asks for an administrator password and a four-digit PIN.
Lite is free for ever. Basic and Professional each start with a 7-day free trial, and a shop gets one trial in all. When you are ready to keep Basic or Professional, pay once. A Basic licence covers one computer.
3. Choose your kind of shop and your country
Setup asks what kind of shop this is, with a tile for each type. The choice sets sensible defaults. It also decides which fields a new product shows. You can change it later in Settings.
Choose your country too. The currency, the formats and the time zone are filled in for you. In Basic and Professional, a garment, shoe or supermarket shop also starts with variant options, such as size and colour.
You can skip every step except the business name, and finish the rest later. The setup pages list each setting.
4. Add your products
Add each product with a name, a price and a unit. Those are the only three things you must enter. A product with no barcode can be given one from the shop’s own prefix.
Basic and Professional can import products from a spreadsheet, starting from a template with sample rows. The file is checked before anything is saved. The import guide explains the steps, and the products page covers the rest.
5. Connect the scanner and the receipt printer
Plug in the barcode scanner, then test it before the first sale. The scanner tab has a try-it box. Scan a code into it to see what arrived. It looks nothing up. A scanned code that matches a product exactly is added to the sale at once, with no Enter press.
A USB receipt printer is found when you plug it in. A Bluetooth printer must be paired in Windows first, and then SellyPOS lists it. The printer step asks how the printer is connected, lets you name it, prints a test page and saves it. SellyPOS works with 58 mm and 80 mm thermal receipt printers. A scanner and a receipt printer are in every edition. Without a scanner, you find a product by typing its name or code. The hardware page covers each connection.
6. Make a first test sale
Open the Sales screen. It opens ready to sell, with an empty cart and the entry box ready for a scan. Scan or type a product, take the cash, and print the receipt. The payment screen shows the change due as you type the amount. Then press Enter for the next sale. The complete a sale guide has each step.
If a finished test sale is wrong, void it. The void adds new linked records that reverse the sale. The original stays in history, marked void. A sale can be finished with no network connection.
7. Before you open: backups and sign-ins
Basic and Professional back the shop up to a folder you choose, once a day, and keep a history of past backups. Each backup is checked as soon as it is made. Keep the backup folder off the Windows drive, so a Windows reinstall cannot take the backups.
Lite has no backup, restore, import or export, and it says so on screen. A failed hard disk on a Lite computer loses its records. If you cannot accept that risk, choose Basic or Professional.
Give each person who sells their own sign-in. Cashiers sign in with a password and switch with a PIN. In Basic and Professional, add a staff member with a name, then give app access and a role. After a power cut, SellyPOS shows a recovery summary before the first sale.
Where SellyPOS stands
The steps above are in every edition, with these differences:
- Lite holds up to 20 products. It has no backup, restore, import or export.
- Basic adds spreadsheet import, the daily backup, and staff sign-ins with roles.
- Professional adds barcode labels, serial and IMEI tracking for devices, several counters and several stock locations.
Moving up keeps your data, because Basic or Professional installs over the same data. The price is on the pricing page.
Next
Once you are trading, read how to count stock in your shop. For the features to ask about, read a checklist of POS software features. Not sure which edition fits? Read choosing between Lite, Basic and Professional. Then compare prices or download SellyPOS.
Questions people ask
How do I set SellyPOS up for my kind of shop?
At setup, choose your kind of shop from the tiles. The choice sets sensible defaults for the shop and decides which fields a new product shows. Choose your country from a list you can type to filter, and the currency, formats and time zone are filled in for you. You can change the business type later in Settings. To confirm, you type the word CHANGE, and the screen names what the new type changed. Settings you changed yourself are left alone. See POS software for your kind of shop.
Which computers does SellyPOS run on?
Windows 10 (version 1809 or later) and Windows 11, 64-bit. At least a dual-core processor (such as an Intel Core i3), 4 GB of memory, 500 MB of free disk space and a 1366 × 768 screen; a quad-core processor, 8 GB of memory and an SSD are recommended. SellyPOS is a native Windows program, so it runs on the computer itself, not in a browser. Versions for macOS and Linux are planned. Full system requirements.
Do I need a receipt printer or a barcode scanner?
No. Without a barcode scanner, you find products by typing their name or code, and receipt printing can be turned off when no printer is connected. When you add a receipt printer, SellyPOS works with 58 mm and 80 mm thermal printers over USB or Bluetooth. Hardware it works with.